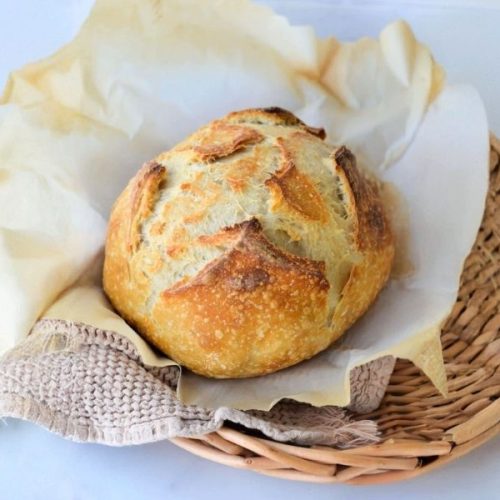
Simple Sourdough Bread
A no-fuss, overnight sourdough bread recipe with a crisp crust, tender interior, and simple hands-on steps. Fermented naturally for flavor and gut-friendly benefits, it's a great everyday loaf for busy home bakers.
Equipment
- 1 Bowl with Cover – for bulk fermentation
- 1 Kitchen Scale – for accurate flour, water, and starter measurements
- 1 Dutch Oven – for baking and steam trapping
- 1 Sheet of Parchment Paper – for clean transfer to Dutch oven
- 1 Bench Scraper (optional) – for shaping dough
Ingredients
- 60 grams active sourdough starter approximately ¼ cup – bubbly, ripe, and recently fed
- 340 grams water about 1⅓ cups + 2 tablespoons – preferably filtered or lukewarm
- 10 grams fine sea salt roughly 1½ teaspoons
- 500 grams bread flour or all-purpose flour; about 3⅔ cups
Instructions
- Prepare the Starter (if needed): If your sourdough starter is already bubbly and active, it’s ready to go. If not, feed it ahead of time so it has time to rise. To do this, combine 5–10 grams of starter with 50 grams each of flour and water. Let it sit at room temperature (ideally 76–78°F) for 10–12 hours, or until doubled in volume and full of bubbles.
- Combine Ingredients to Form Dough: In a large bowl, stir together 60 grams of active starter, 340 grams of water, 10 grams of salt, and 500 grams of flour. Mix until no dry bits remain and a rough, sticky dough forms. You can use your hands, a wooden spoon, or a dough whisk—whatever you’re most comfortable with.
- Let Dough Rise (Bulk Fermentation): Cover the bowl with a lid or reusable cover and leave it in a warm area of your kitchen, around 76°F. Let the dough ferment undisturbed for 10–12 hours, or until it has visibly doubled in size and looks airy and expanded. This can be done overnight for convenience.
- Tip: You can adjust your schedule by mixing in the evening and shaping in the morning, or vice versa.
- Shape the Dough: Once doubled, gently turn the dough out onto a clean surface. Lightly dampen your hands and use a bench scraper if you have one. Tuck and rotate the dough to shape it into a smooth, round ball. This step gives your loaf structure and strength before baking. Place the shaped dough onto a piece of parchment paper.
- Final Proof (Second Rise): Loosely cover the dough with plastic wrap or place an upside-down bowl over it to prevent drying out. Let it rest for 1–2 hours, until it’s puffed up and looks relaxed. It should hold its shape but feel lighter and airier when gently pressed.
- Preheat and Score: About 20 minutes before baking, place a Dutch oven with its lid into your oven and preheat to 500°F (260°C). Once heated, use a sharp knife or bread lame to make 1–2 slashes across the top of the dough. This scoring controls the expansion of the bread while baking.
- Bake the Bread: Carefully remove the hot Dutch oven using oven mitts. Lift the parchment paper and dough into the Dutch oven. Replace the lid, lower the oven temperature to 450°F (232°C), and bake covered for 25 minutes. Then, remove the lid and continue baking for 20 more minutes to develop a deep golden crust.
- The bread is done when it has a hard, hollow-sounding crust and an internal temperature of around 205°F (96°C).
- Cool and Slice: Remove the bread from the Dutch oven and let it cool on a wire rack for at least 1 hour. Slicing too soon will compress the crumb and affect texture. Once fully cooled, slice and enjoy!
Notes
- Flour Choice: Bread flour offers a chewier crumb, but you can use all-purpose flour for a slightly softer loaf. If using all-purpose, reduce the water slightly (by 10–20 grams).
- Starter Substitute: Want to try it with instant yeast instead? Use ¼ teaspoon instant yeast in place of the starter and add an extra 30 grams of water and 30 grams of flour.
- No Stretch-and-Folds: This recipe skips the stretch-and-fold technique, making it ideal for beginners or busy schedules. Despite its simplicity, it still produces a rustic, delicious loaf.
- Temperature Control: Dough rises best in warmer environments (75–78°F). If your kitchen is cold, you can place the bowl in the oven with just the oven light on, or near a warm appliance.
- Cold Retard Option: For a tangier flavor, refrigerate the dough right after it finishes bulk fermentation (before shaping). Leave it chilled for up to 12 hours, then shape and proceed as usual.
- Meal Prep Tip: Once cooled, slice and freeze the bread for easy toast or sandwiches throughout the week.