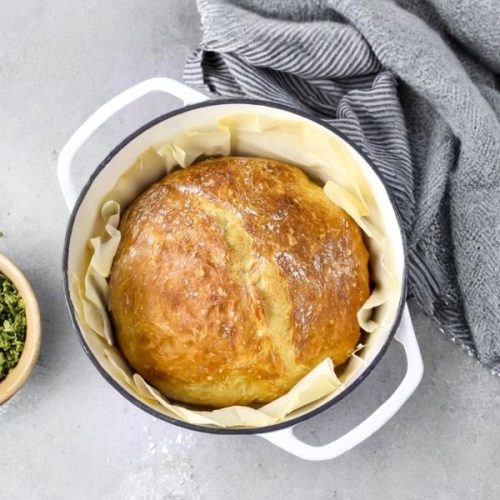
Easy No-Knead Artisan Bread
This No-Knead Artisan Bread recipe transforms a handful of simple ingredients into a bakery-quality loaf at home. Its no-knead technique allows the dough to develop flavor and texture naturally through a long rest, resulting in a crusty, golden exterior and tender crumb inside. Perfect for everyday baking, this recipe requires minimal hands-on time and offers flexibility with storage and freezing options.
Equipment
- 1 Large Mixing Bowl
- 1 Dutch Oven (4-6 Quart) with Lid
- 1 Bench Scraper or Spatula
- Parchment Paper
- Kitchen Thermometer
Ingredients
- 3 cups plus 2 tablespoons about 390 grams all-purpose flour, plus extra for dusting
- 1½ teaspoons sea salt
- ½ teaspoon instant dry yeast quick-rise yeast can be used
- 1½ cups 354 ml warm water (around 120°F to 130°F)
Instructions
- Combine Dry Ingredients: In a large mixing bowl, whisk together the flour, salt, and yeast until fully blended. This evenly distributes the yeast and seasoning throughout the flour.
- Add Warm Water and Form Dough: Pour the warm water into the dry mixture. Stir gently with a spatula until a sticky, rough dough forms. Avoid overmixing; the dough should look shaggy and somewhat loose.
- Initial Dough Rest: Cover the bowl tightly with plastic wrap or a damp kitchen towel. Place it in a cozy, draft-free spot at room temperature. Let the dough rest undisturbed for about 3 hours. During this time, it will rise and develop bubbles on the surface.
- Shape the Dough: After the resting period, flour your work surface generously. Using a sturdy spatula or bench scraper, carefully transfer the sticky dough onto the floured surface. Lightly dust the top of the dough with flour. Gently fold the dough inward about 5 to 7 times, forming a rounded loaf shape. Be careful not to press too hard, preserving the airy texture.
- Second Proof: Lay a sheet of parchment paper inside a large bowl, then place the shaped dough seam-side down on top of it. Lift the edges of the parchment paper to cover the dough, then cover the bowl loosely with plastic wrap or a towel. Allow the dough to rest for another 30 minutes, during which it will puff slightly.
- Preheat the Oven and Dutch Oven: Place a Dutch oven with its lid inside your oven and preheat to 450°F (230°C). Let the pot heat for the entire duration of the dough’s second rest.
- Bake the Bread: Carefully remove the hot Dutch oven from the oven. Using the parchment paper, lift the dough and place both into the pot. Trim any excess parchment paper if it extends too far to avoid burning. Cover with the lid and bake for 30 minutes.
- Finish Baking for Crust: After 30 minutes, remove the lid and continue baking the bread uncovered for an additional 8 to 12 minutes, until the crust deepens to a rich golden brown. Watch closely to prevent burning.
- Cool Completely Before Slicing: Take the bread out of the oven and transfer it to a wire rack. Allow it to cool fully for at least 45 minutes before cutting to ensure the crumb sets perfectly.
Notes
- Flour Measuring Tip: For best results, fluff your flour by stirring it lightly before measuring. Use a spoon to scoop it into your measuring cup and level off with a knife without packing it down. This prevents overly dense dough.
- Water Temperature: The water should feel warm to the touch but not hot enough to scald (between 120°F and 130°F). Water that’s too hot can kill the yeast and prevent proper rising.
- Dutch Oven Alternatives: If you don’t have a Dutch oven, any oven-safe pot or dish with a tight-fitting lid can work, as long as it can withstand 450°F. Just ensure it’s large enough to hold the dough.
- Using Active Dry Yeast: If substituting active dry yeast, increase the amount to ¾ teaspoon and dissolve it in ¼ cup warm water with a pinch of sugar. Let it sit until frothy (about 5-8 minutes) before adding to the rest of the water. Reduce the water amount in the recipe to 1¼ cups accordingly.
- Storage and Refreshing: Store the bread at room temperature in a bread box or paper bag for up to two days. To refresh the crust, lightly mist it with water and warm it on a preheated oven rack at 400°F for 5-10 minutes.
- Freezing Instructions: Wrap the bread tightly in plastic wrap and freeze for up to three months. For convenience, slice before freezing so you can thaw just what you need. Reheat slices in a 350°F oven for about 15 minutes.