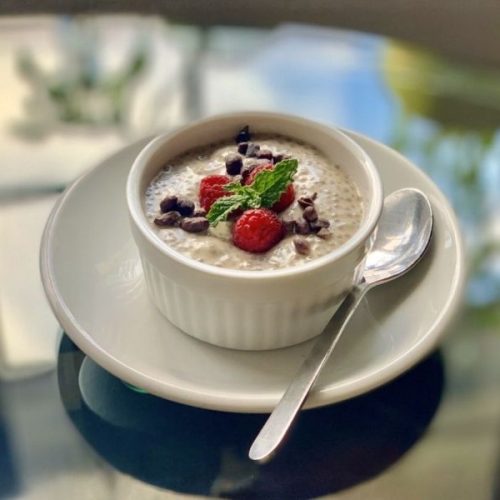
Creamy Banana Coconut Chia Pudding
A creamy, dairy-free pudding that combines coconut and bananas with chia seeds for a high-fiber, protein-rich, and naturally sweet breakfast or snack. Easy to prepare, requires minimal hands-on time, and can be enjoyed chilled.
Equipment
- 1 High-Powered Blender
- 1 Nut Milk Bag or Cheesecloth
- 1 mixing bowl
- 4–6 Glass Containers or Jars
Ingredients
- 1½ cups unsweetened coconut flakes
- 4 –6 Medjool dates pitted (or 2–4 tbsp maple syrup, optional)
- 2 cups hot water
- 2 bananas peeled (fresh or frozen)
- ⅓ cup chia seeds
Optional toppings: cacao nibs, berries, banana slices, coconut shreds
Instructions
- Prepare the Coconut Base: Start by measuring 1½ cups of unsweetened coconut flakes and placing them into your high-powered blender. Pour in 2 cups of hot water to help extract the natural creaminess from the coconut. Add 4–6 pitted Medjool dates if you prefer a naturally sweetened pudding. If you’re using maple syrup instead, skip this step for now. Blend the mixture on a “whole juice” or high-power setting until fully combined and smooth. This step transforms the coconut and dates into a rich, creamy liquid that forms the foundation of your pudding.
- Steep and Strain Coconut Milk: Once blended, allow the coconut mixture to steep for 10 minutes. This resting time lets the coconut release maximum flavor and creaminess. After steeping, place a nut milk bag or cheesecloth over a clean mixing bowl. Pour the coconut mixture into the bag and gently squeeze and twist until all liquid is extracted. Discard the remaining coconut pulp or reserve it for baking or smoothies. This straining step ensures a silky-smooth coconut milk base without any grainy texture.
- Blend with Bananas: Pour the freshly strained coconut milk back into the blender. Add 2 peeled bananas—ripe bananas are ideal as they bring natural sweetness and creaminess. If you opted for maple syrup instead of dates, add it now. Blend on the “smoothie” or high-power setting until the mixture is completely smooth and slightly frothy. This creates a luscious, creamy liquid that will coat the chia seeds evenly.
- Incorporate Chia Seeds: Transfer the banana-coconut milk into a large mixing bowl. Add ⅓ cup chia seeds and stir thoroughly using a spatula or spoon. Make sure the chia seeds are evenly distributed to prevent clumping.The seeds will absorb the liquid and swell overnight, forming a thick, pudding-like texture. This step is crucial for achieving a perfectly creamy, gel-like consistency.
- Portion and Chill: Divide the chia pudding into glass containers or small jars, making it easy for portion control and meal prep. Cover each container tightly with a lid or plastic wrap and place in the refrigerator for at least 12 hours. Overnight chilling allows the chia seeds to fully hydrate and the flavors to meld together.
- Serve and Garnish: Once chilled, your pudding is ready to enjoy. Top with optional garnishes like cacao nibs, fresh berries, sliced bananas, or extra coconut flakes for added texture and visual appeal. Serve directly from the jar or transfer to a bowl. This pudding can be enjoyed as a nutritious breakfast, satisfying snack, or healthy dessert, making it a versatile addition to your weekly meal prep routine.
Notes
- Use very ripe bananas for natural sweetness and creamier texture.
- Chia seeds will triple in size as they soak; stir well to prevent clumping.
- The pudding tastes best after overnight chilling to allow flavors to fully meld.
- Substitute maple syrup for dates for a smoother texture and customizable sweetness.
- Optional toppings like cacao nibs, fresh berries, or coconut shreds add flavor and visual appeal.
- Coconut pulp can be reserved for smoothies or baking instead of discarding.
- This recipe is gluten-free, dairy-free, and vegan, making it suitable for most dietary preferences.