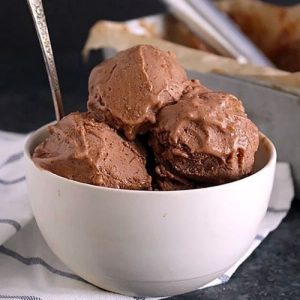
Chocolate Almond Butter Ice Cream
This paleo chocolate almond butter ice cream is creamy, rich, and completely dairy-free. Made with coconut milk, almond butter, and natural sweeteners, it’s a nutritious, low-sugar treat that’s perfect for dessert or meal prep. Easy to make and satisfying for chocolate lovers, it’s a wholesome frozen delight that everyone can enjoy.
Equipment
- 1 ice cream maker (chilled at least 24 hours)
- 1 small saucepan
- 1 whisk
- 1 loaf pan
- Parchment Paper
- Measuring Cups and Spoons
- 1 mixing bowl
- Spoon or spatula
Ingredients
- 27 oz 2 cans, 13.5 oz each full-fat coconut milk
- ½ cup honey
- 1 ½ teaspoons gelatin
- ½ cup almond butter
- 6 tablespoons cacao powder
- ½ cup almond butter for swirling
Instructions
- Prepare Ice Cream Equipment: Before you start, ensure your ice cream maker’s bowl has been frozen for at least 24 hours. This is essential for achieving a smooth, creamy texture without ice crystals. If you skip this step, your ice cream may turn icy instead of velvety. While the bowl is freezing, gather all ingredients and equipment so everything is ready to go.
- Heat Coconut Milk and Sweetener: Take a small saucepan and pour in the full-fat coconut milk. Add the honey, which acts as a natural sweetener and contributes to the ice cream’s creamy consistency. Use a whisk to blend the coconut milk and honey together thoroughly until smooth and fully combined. Heating this mixture gently will allow the flavors to marry and create a luscious base.
- Bloom Gelatin for Creaminess: Sprinkle the gelatin evenly over the warm coconut milk mixture. Let it sit undisturbed for about 5 minutes to “bloom.” Blooming gelatin allows it to absorb moisture and dissolve properly, preventing lumps in your ice cream. After blooming, whisk the mixture until the gelatin is fully incorporated and smooth. This step ensures your ice cream has a rich, thick texture.
- Incorporate Almond Butter and Cocoa: Add the almond butter and cacao powder to the saucepan. Almond butter adds healthy fats and a nutty flavor, while cacao powder delivers deep, chocolatey richness.Turn your stove to medium heat and stir constantly, warming the mixture gently until it is fully combined and slightly thickened.Avoid boiling; too much heat can affect texture and flavor.
- Chill the Ice Cream Base: Once the mixture is smooth and uniform, pour it into a separate container and place it in the refrigerator. Allow it to chill for at least 5 hours or preferably overnight. Cooling the mixture thoroughly is crucial, as it helps the ice cream churn properly and maintain a creamy, scoopable texture.
- Churn the Ice Cream: After chilling, pour the cooled mixture into your pre-frozen ice cream maker. Follow the manufacturer’s instructions carefully. Typically, the mixture should churn for about 20 minutes. As it churns, it will thicken and increase in volume, developing that soft, creamy consistency that makes homemade ice cream irresistible.
- Prepare Loaf Pan for Layering: While the ice cream churns, prepare a loaf pan lined with parchment paper. Cut the paper so that it hangs over the edges for easy lifting later. This step makes layering and freezing simpler and ensures the ice cream can be removed cleanly without sticking to the pan.
- Layer Ice Cream and Almond Butter: Scoop half of the churned ice cream into the prepared loaf pan. Gently swirl in a layer of almond butter using a spoon or spatula. Repeat with the remaining ice cream and almond butter, creating beautiful alternating layers. These swirls not only look visually appealing but also create pockets of creamy almond butter throughout every bite.
- Freeze Until Solid: Place the layered ice cream in the freezer and allow it to firm up overnight for the best texture. If you prefer soft serve immediately, you can enjoy it right away, but full freezing ensures a firm, scoopable dessert. This step is crucial if you want to serve clean slices or portion-controlled servings.
- Serve and Enjoy: When ready to serve, remove the ice cream from the freezer and let it sit at room temperature for about 10 minutes. This softens it slightly, making it easier to scoop without losing shape. Use an ice cream scoop to serve, and optionally, drizzle a little extra almond butter or sprinkle cacao powder on top for garnish.
- Optional Tips for Best Results: Use high-quality almond butter for the best flavor and creaminess. Do not skip chilling the base, as it ensures smooth texture. For extra chocolatey flavor, add 1–2 teaspoons of cocoa powder directly to each layer while swirling. Store leftover ice cream in an airtight container to prevent freezer burn.
Notes
- Always chill the ice cream base thoroughly before churning; this ensures smooth, creamy texture.
- Use high-quality, natural almond butter without added sugar or oils for the richest flavor.
- Bloom the gelatin properly to avoid lumps and achieve a consistent creaminess.
- Freeze the ice cream in layers with almond butter swirls to create a visually appealing dessert and evenly distributed flavor.
- Let the ice cream sit at room temperature for 5–10 minutes before scooping for easier serving.
- This recipe can be customized with toppings like cacao nibs, crushed nuts, or a drizzle of dark chocolate.